Start with the room
A clear sketch tells us more than a list of numbers.
Measurements, walls, appliances, sinks, seams, and photos work together to show how your custom surface needs to fit.
Prepare for your quote
Use this guide to sketch your room, record countertop dimensions, mark appliances and walls, and gather the details needed for a more accurate custom quote.
Start with the room
Measurements, walls, appliances, sinks, seams, and photos work together to show how your custom surface needs to fit.
Before you begin
Accurate preliminary measurements help determine material quantity, possible seams, cutouts, overhangs, and installation requirements.
Your drawing does not have to be perfect. It simply needs to clearly show the room and identify the dimensions that matter.
Helpful measuring tips
Follow these guidelines to create a clear starting point for countertop, desktop, table, or room planning.
Record preliminary dimensions to the nearest half-inch and double-check every measurement.
On the worksheet, each square can represent one foot so the overall room remains proportional.
Sketch each cabinet or countertop run in the same position it occupies in the room.
Label sinks, cooktops, ranges, refrigerators, windows, doors, fireplaces, and other fixed items.
Show which edges meet walls or backsplashes and which edges will remain visible.
Photograph the full room, each countertop run, plumbing, corners, and anything unusual.
Reference examples
These examples show the type of information that helps Brayden understand your layout before final measurements are confirmed.
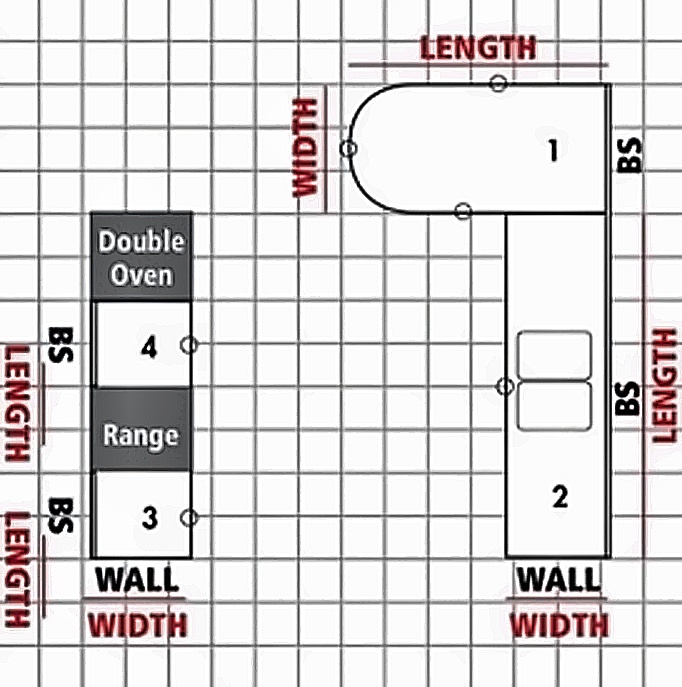
Show each cabinet run, the wall behind it, appliance locations, sink position, and the length and depth of every countertop section.
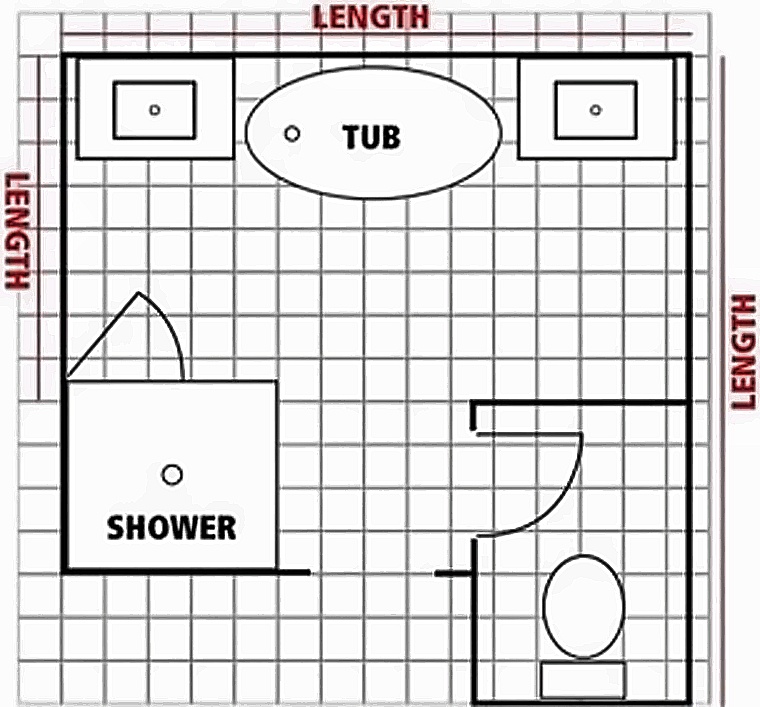
Include the vanity, walls, shower or tub, plumbing position, door clearance, and the full size of the room when flooring or trim is involved.

Planning the sink cutout
Both styles can work with butcher block, but the cutout, edge finishing, installation, and maintenance requirements are different.
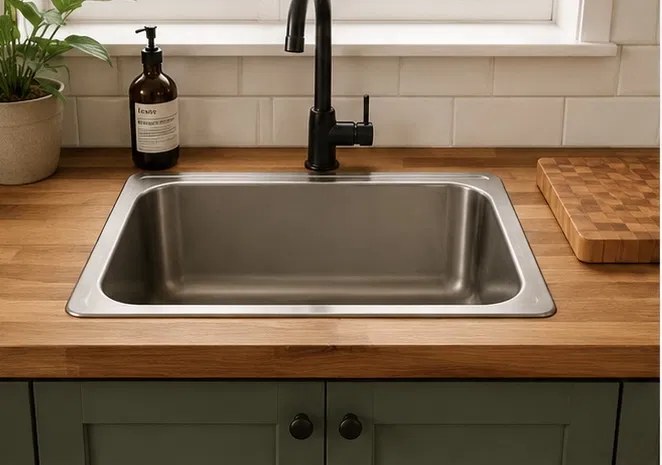
The sink rests on top of the countertop with a visible rim covering the cut edge.
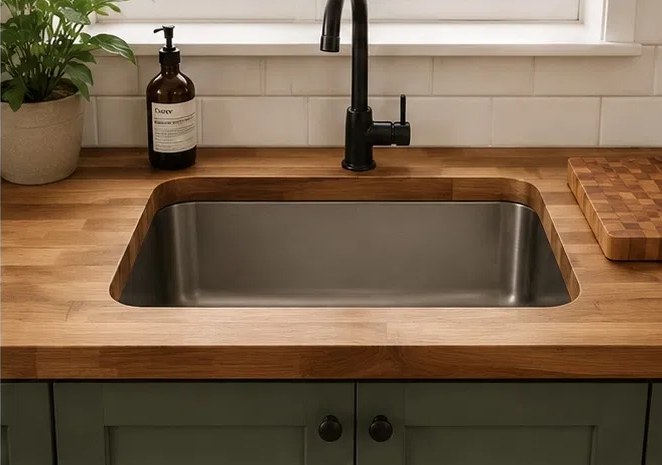
The sink mounts below the countertop so the finished wood edge remains visible around the opening.
Send your sketch, photos, dimensions, and project details to begin your custom quote.